Frequently Asked Questions
How do I add more staff logins?
You can create a new user whenever a new person needs to access the Testwise system.
When you create a user:
- It is added to the Users List, so you can view or modify their details at a future date.
- The newly created user receives a New User Profile email, which contains an Activate Account link. When the new user clicks the Activate Account link, the Reset Password screen is displayed, so they can change their password to one of their choosing, rather than using the one allocated to their user by the System Administrator or School Administrator.
Note: You can only access the Users functional area if you have the relevant user permissions. The School Admin user role can access this area, but the Teacher role does not have access to this area.
To create a new user
1. Click on the Users button  on the Testwise home screen. All existing users will be displayed in the Users List.
2. Click the Add User button  . The 'Add User' screen will be displayed.
3. Enter details of the new user in the boxes displayed. See Understand User Details for guidance about the type of information you can enter in each box.
4. Once you have finished entering user details, double-check that you have entered information in all mandatory fields, otherwise you will not be able to complete the process. You can identify mandatory fields by finding field names that have an asterisk displayed next to them. For example, if 'Email' is a mandatory field, then it will be displayed as Email*.
If a red warning triangle appears alongside a field, hover your mouse over the triangle to read the error message. Change the information you entered in that field to ensure it contains information that will be accepted by the system.
5. When you have finished entering all required user details and no red warning triangles are appearing on the screen, click the Save button.
A green 'User Successfully Created' message will appear in the bottom-right corner of the screen.
You will now be able to see the newly created user at the top of the Users List.
Note: If you selected the Test Taker role, then the new user will appear in the Students List. It is not recommended that you select the Test Taker role for a new user.
6. To return to the home screen, click on the Home button.
How do I reset staff passwords?
If a user  has problems accessing Testwise, they may need to have their password reset.
When you reset a user password, the user will receive an email containing a link to a page that will enable them to enter their new password.
Note: You can only access the Users functional area if you have the relevant user permissions. The School Admin user role can access this area, but the Teacher role does not have access to this area.
To reset a user password
1. Click the Users button  from the Testwise home screen. All existing users are displayed within the Users List.
2. Find the user whose password you want to reset.
3. Click the Actions  button displayed alongside the user's name.
4. The Edit and the Reset Password buttons will now appear, overlapping the User Name in the first column.
5. Click the Reset Password  button.
A green message will appear in the bottom right corner of the screen, confirming that the reset process has begun.
The user will receive an email with the subject 'You Requested a New Password', which will prompt them to click on a Change Password link. When they click on the link, the 'Change Password' screen will be displayed, where they can enter their new password.
6. Once they have entered a new password and clicked on the Save button, they will receive an email with the subject 'Password Successfully Changed'.
The process of resetting a user password is now complete.
7. To return to the home screen, click on the Home button.
What access permissions does a Teacher user role have?
If your user role is that of a Teacher, then you will be able to access the following functional areas of the system:
- Sittings
- Students
- Services
- Reports
Each of these functional areas is available for you to access from the home screen.
If you want to check which role a particular user has been allocated, then you can view the user details on the 'Edit User Details' screen. Follow the steps mentioned in the 'Change Details of a User' section to access the 'Edit User Details' screen.
What access permissions does a School Administrator user role have?
If your user role is School Administrator, then you will be able to access the following functional areas of the Testwise system:
- Sittings
- Students
- Services
- Reports
- Users
- My Organisation
Each of these functional areas can be found on your home screen.
If you want to check which role a particular user has been allocated, then view the user details within the 'Edit User Details' screen. Follow the steps mentioned in the 'Change Details of a User' section to access the 'Edit User Details' screen.
How do I log in if I've forgotten my password?
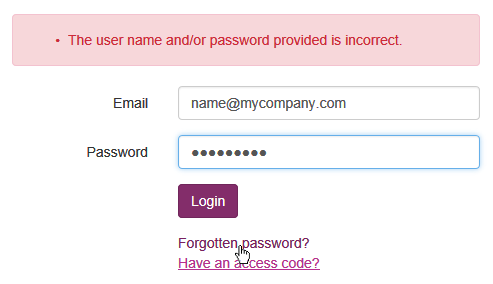
If you cannot log into the system because you have forgotten your password, click on the Forgotten Password? link on the Login screen and follow on-screen instructions to reset your password.
How do I log out?
You can log out of Testwise from any Testwise screen.
Before logging out, you should ensure that you have saved any information you have been working with.
The process for logging out of Testwise is the same as the method that a Student would use to log out of the platform once they have completed their assessments.
To log out of Testwise
Click on your User Name at the top right of the screen to display the drop-down list.
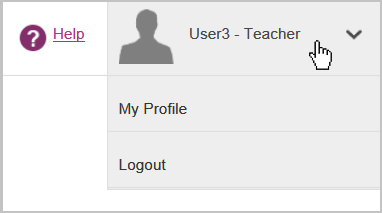
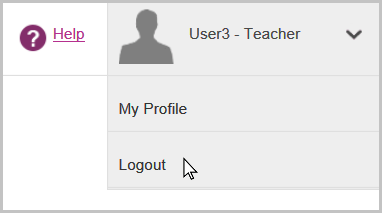
Select Logout from the drop-down menu.
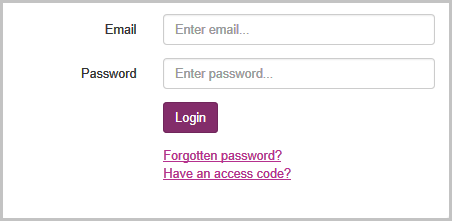
The Testwise Login screen will be displayed.
You can now either log in as a different user or close your web browser if you have finished working on Testwise.
How do I change my own password?
You can change the password that you use to log into Testwise yourself, whenever required.
To change your own password
1. Click your User Name at the top right of the screen to display a drop-down list.

2. Select My Profile from the drop-down menu to display your login details.
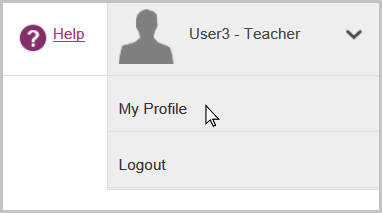
3. Click on the Change Password button.
4. Enter your current password into the 'Current Password' field.
5. Enter your new password into the 'New Password' and 'Confirm New Password' fields.
A green 'Password Updated Successfully' message will appear at the bottom-right corner of the screen.
6. Click on the Save button.
A green 'Profile Updated Successfully' message will appear at the bottom-right corner of the screen and you will be redirected to the home screen.
The next time you log into Testwise, you must enter your new password.
How do I add our school logo to front page of Reports?
You can choose which Reports contain a logo on the cover page, each time you create a Report.
Adding a logo to a Report is a two-stage process, which you can see by referring to the Define A Logo For Reports section.
Which assessments can be administered using a tablet?
CAT4, PASS, NGRT, and NGST can all be administered using a tablet device as well as a computer.
Follow these instructions for how to set up your tablet for these assessments.
I'm using a tablet to administer my assessments – what do I need to know?
Testplayer supports tablet use for all products, with the exception of the following:
- PTE
- PTM
- Dyslexia Screener
- Dyscalculia Screener
Tests must be taken in landscape mode.
Each student will need a tablet and a set of headphones.
We suggest setting up the tablets in advance, including modifying necessary settings, so that upon opening the Testwise app, you are taken directly to the Access Code screen. We suggest turning off spell-checker and autocorrect as part of your setup process. This is a requirement for NGST. For guidance on how to do this, click here.
What should I do if I have duplicate entries in my student bank for the same pupil?
You should only have one record per pupil on Testwise. If you have duplicate pupils in your student bank, you will need to contact your Account Manager for instructions on how to request for the duplicate details to be merged.
We will provide you with a document to complete, to help us understand which entry should be treated as the master entry and which one needs to be merged. Duplicate entries may mean that the student testing data is spread across the multiple instances, and this can prevent CAT4 Combination Reports or PT Series Year-on-year Progress Reports from getting generated. Please note that once the data has been merged, it cannot be retrieved, so we advise you to exercise extra caution during this process.
What is a Sitting?
Sittings are used to define which students take which tests and when. Once a Sitting has been created and started, each student will be able to log into the Test Lobby and take their assigned tests.
For a quick summary of the main functions within the Sittings area, you can watch the Sittings video.
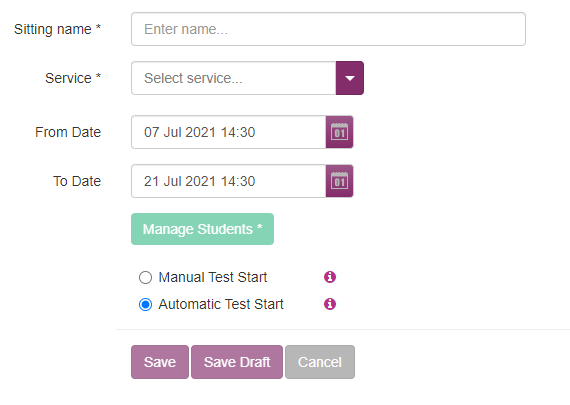
The above screenshot shows a Sitting named 'Sitting 4' in which 'CAT4 Level D Group' test has been allocated to three students, with a Test Start Period of 3 pm to 4 pm on 08 Dec 2020. This means that three specified students will be able to log into the Test Lobby between 4 pm and 4:59 pm on 08 Dec 2020 and begin taking the CAT4 Level D Group test.
How much time each student is given to complete the CAT4 Level D Group test, is defined within the test itself and cannot be changed in Testwise. The duration of each test is mentioned in the Teacher Guidance Pack for the selected test.
Sittings process

The Sitting Process can be summarised as follows:
1 Check students who need to be tested are contained within the Student List, by viewing students. If the students are not in the Student List, then you should add students or import students to ensure they do appear in the Student List.
2 Create a sitting, using the Sittings Wizard, which prompts you to enter all the information required to create a sitting.

3 Distribute Student Login Details and Test Taking Instructions to each student.
4 Each student logs into the Test Lobby and waits until the test starts. Test can start automatically or can be manually started, depending upon the Test Start Mode that was selected within the Sittings Wizard.
Note: A Teacher may log into the Test Lobby on behalf of some students if it is inappropriate or not possible for them to do it themselves.
5 Each student completes the tests allocated to them. Using our example:
- Student 1 could log into the Test Lobby at 3pm on 08 Dec 2020, spend 62 minutes completing their tests and then log out of the Test Lobby at 4:02pm.
- Student 2 could log into the Test Lobby at 3:58pm on 08 Dec 2020, spend 62 minutes completing their tests and then log out of the Test Lobby at 5pm.
- Student 3 could log into the Test Lobby at 3:30pm on 08 Dec 2020, complete part of the test, andlog out at 4:15pm. They can return to the Test Lobby for another 17 minutes, which is the amount of time remaining on the CAT4 Level D test. Completing tests in multiple stages is possible but not recommended. If tests are completed in multiple stages, students should ensure that they end each test session at the end of a test section, as this is when test responses are saved by the system.
The Sitting Process can be completed by different users and at different times. It isn’t mandatory to complete the process all at once as each step is a stand-alone area, which can be completed and saved as and when required.
Optional Tasks
To identify how far each student has progressed within each test, you can view the Student Progress for one or more sittings.
Other optional tasks you can complete whilst working within Sittings include: View the Sittings List, View Details of a Sitting, Change Details of a Sitting, Close Sittings, Archive Sittings and Restore Archived Sittings.
What is the Test Start Period?
The Test Start Period is the time range within which a Student can start a specific test in a Sitting.
Students can log into the Test Lobby at any time, however, they will not be able to complete tests unless they have logged in within the Test Start Period.
The Test Start Period is defined while creating a Sitting using the Sittings Wizard.
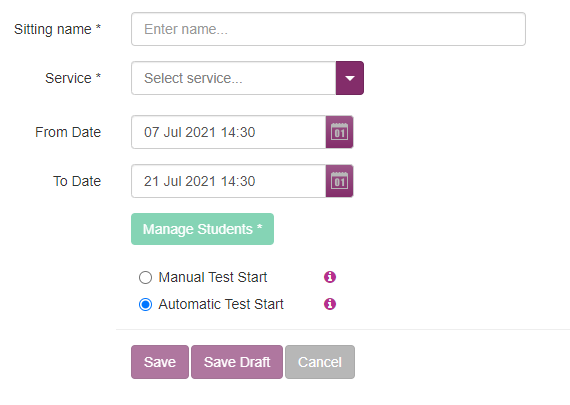
For example, if students were allocated the working hours within the week of 03 May 2021 to start a test, then the 'From' Date and Time would be defined as 03 May 2021 09:30 and the 'To' Date and Time would be defined as 07 May 2021 16:30.
Each Test Start Period cannot be greater than the Maximum Sitting Duration, which is defined by the System Administrator. If your Sitting is for longer than the permitted number of days, then a red warning triangle will appear next to the relevant date. When you hover your mouse over the red warning triangle, it will tell you the number of days that are permitted in the Maximum Sitting Duration. Change one or both of the dates until the red warning triangle disappears.
Note: The default Sitting Duration is set to 14 days, however the Maximum Sitting Duration can be up to 30 days.
What is the Test Start Mode?
The Test Start Mode defines the way in which tests are started. You can choose between two different types of Test Start Modes:
- Manual Test Start - In this mode, tests are manually started by another Testwise user who clicks on the Start Test button on their screen. Please see Manually Start Tests for detail on how to use the manual start feature.
- Automatic Test Start - In this mode, tests are automatically started on the date and time you entered in the 'From' box of the Test Start Period in the Sittings Wizard. This is the default Test Start Mode. Please refer to Automatically Start Tests for details on how this feature operates.
The Test Start Mode is defined when you create a Sitting and can be amended when you change Sitting details.
What is a credit?
One credit is required for each student completing a test.
For example, if you have 50 credits, then 50 students can complete one test.
Whenever a student starts a test (by clicking the Start Test button in the Test Lobby), the number of credits available within a subscription will be deducted accordingly. When no credits are available, your school will have to purchase more credits if you want to continue testing students using the Testwise system.
How do I buy credits?
You can purchase credits from our website or by contacting the Renewals Team.
What is a Student Access Code?
A student access code is a unique 8-character code that is automatically generated for each student, each time a Sitting is created.
Students enter their access code into their web browser to access the Test Lobby and view their tests. For full details of this process, see Test Taking Instructions for Students.
Finding Student Access Codes
Student access codes can be found on the Student Progress screen or in the Student Login Details PDF page.
Distributing Student Access Codes
Since the method of distributing access codes to students is not automated by the system, you can choose your own method of distribution, which could include printing out the PDF file and giving each student a physical piece of paper, or emailing the access code to each student, or entering their access code into the platform for them.
Is there a way to sort the access codes alphabetically or by class?
Yes, if you download all the access codes in the .csv format, you will be able to sort them by the following columns:
- Group
- Year
- Student Forename
- Student Surname
How do students log into the Test Lobby?
This page contains the most frequently asked questions relating to how students access the system.
How can Students log out of the Test Lobby correctly?
If Students do not log out of the Test Lobby correctly, then their test results may not be recorded by the system.
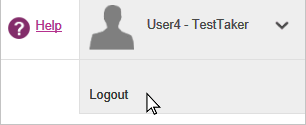
This means that the student may have to complete the test all over again. To log out of the Test Lobby correctly, the student should click their name at the top right of the screen and select 'Logout' from the menu.
How do I view student progress?
You can view a student's progress in a number of different ways:
- Monitor Student Progress - This option displays the status of each student within a Live Sitting.
- View Student Activity Log - This option displays a list of all the assessments a student has been assigned, and whether or not they have started and completed these tests. The date and time for each of these events is mentioned.
- Preview Reports - This option displays student assessment results in Interactive HTML, PDF or MS Excel formats.
Where do I find student login details?
All Student login details are mentioned with the student access code and in the Test Taking Instructions for Students, which can be printed out and given to students.
In order for each student to log into the Test Lobby to complete the tests that have been allocated to them, they will need their Student login details.
Rather than using usernames, email addresses or passwords to log into the Test Lobby, students can use a unique 8-digit number, instead.
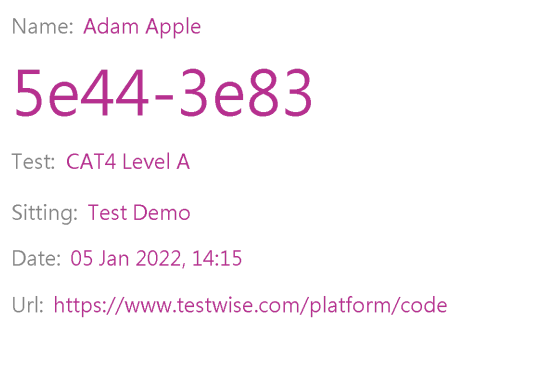
Student Login details contain the following information for each student:
- Name - The student's name
- Student Access Code - A unique 8-digit code that is generated for each Student user in each Sitting. You can also view each Student's Access Code while monitoring student progress.
- Sitting Name - The name of the sitting.
- Date - The earliest date and time at which the test can begin. This is the 'From' date and time of the Test Start Period.
- Test(s) - The name of the test(s) that the Student will be completing.
- URL - The web address to enable students to log into the Test Lobby.
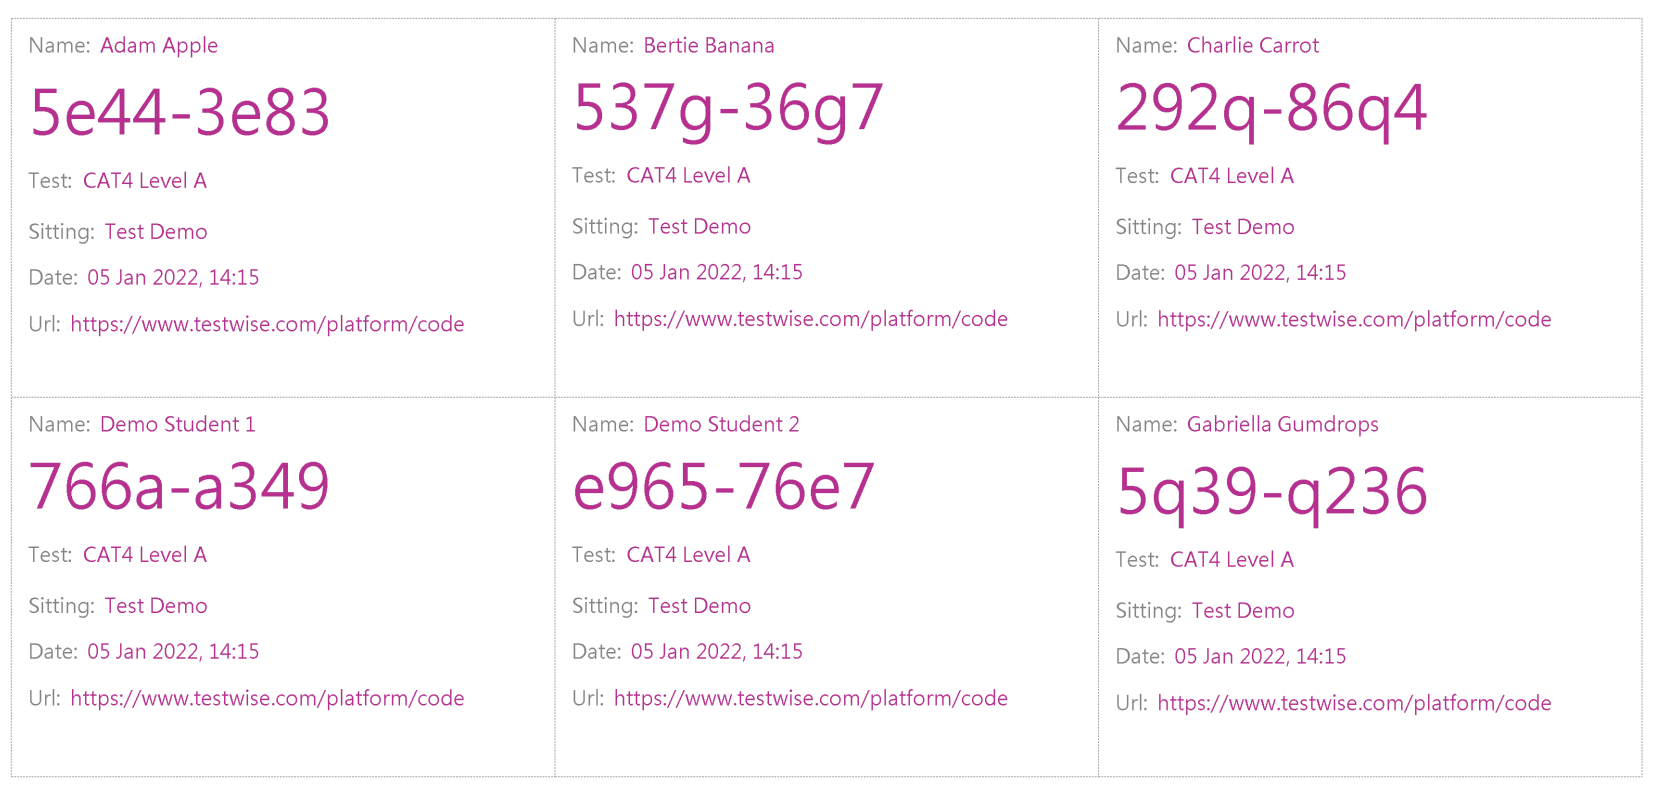
Once you have created a Sitting, you can download, save or print a PDF or CSV file containing all the Student Login Details for all the Students within that Sitting. The PDF file is created in a landscape A4 format and contains multiple Student Login Details on each page. If you print the Student Login Details, you can then divide the A4 sheet into sections and distribute the Student Login Details to each individual student. The CSV file contains the access codes and student details in a table format.
Once the Student has been given their Student Login Details and the Test Start Period has begun and the test has started in Testwise (automatically or manually), the Student can log into the Test Lobby, click on the Start Test button and begin answering questions.
Note: You can only download Student Access Details for Sittings whose status is 'Live'. You cannot download Student Access Details for Sittings that have a status of 'Draft', 'Expired', 'Closed' or 'Completed'.
To download student login details
1. Click on the Sittings button  on the home screen. All existing Sittings will be displayed in the Sittings List.
2. Find the Sitting that contains the Student Login Details that you want to download.
3. Click the Actions button  displayed alongside the Sitting Name. The Edit and the Download Access Codes buttons will now appear and overlap the Sitting Name in the first column.
4. Click the Download Access Code PDF button  or Download Access Code CSV button
  to download the Student Login Details for the selected Sitting.
5. Depending on the chosen download format, you can open or save the PDF or CSV file, as suggested by your web browser.
The PDF file containing your Student Login Details will look similar to the example below:
The CSV file will be in a table format similar to the example below:
|
Sitting Name |
Test Name/Level |
First Name |
Last Name |
Unique Identifier |
Date of birth |
Gender |
Group |
Year |
External Reference |
Free School Meals |
Ethnic Group |
SEN |
English as a Second Language |
Custom 1 |
Custom 2 |
Access Code |
|
PTM Level 8 - 3W |
PTM Level8 |
Test |
User 1 |
12345 |
01/01/2010 |
Male |
3W |
3 |
No |
Yes |
A111-A111 |
|||||
|
PTM Level 8 - 3W |
PTM Level8 |
Test |
User 2 |
67890 |
01/02/2010 |
Female |
3W |
3 |
No |
No |
B111-B111 |
6. You can either save this file, if you have not already done so, or print it.
7. Close the PDF or CSV file when you have finished working on it and close the software that was used to display the file.
Why can't students log in to take their tests?
If a student cannot login to take a test then the following items should be checked:
Teacher or School Admin Tasks
- Ensure the status of the sitting is displayed as Live or Started in the Sittings List. See View the Sittings List.
- Check the status of the student to ensure that another student has not used the same access code. See Monitor Student Progress.
- Check the student's activities within Testwise. See View Student Activity Log.
Student Tasks
- Ensure the student has been given the correct access code.
- Ensure the student has a copy of the Test Taking Instructions for Students and has followed all the steps correctly.
- Ensure the student has entered the correct web address and typed the access code in correctly. Email both of them to student to ensure that there are no typing errors or type them into their computer yourself. The web address for accessing the Test Lobby is https://www.testwise.com/platform/code.
What does 'Deactivate' mean?
Deactivation is the process of moving older items (or items that are no longer required) to a different location on your system.
You would normally use deactivate if you wanted to reduce the number of items on your screen (within a list), so that you could focus on the current and newer items, which are more relevant to your everyday tasks.
If you keep adding new items to the system, then your lists could become difficult to manage and you might have difficulty finding the items you require.
For example, you might want to deactivate all students who have left the school, at the end of each academic year.
The 'deactivate' function can be used in a number of different areas:
- Deactivate Students
- Deactivate Sittings
- Deactivate Users
When displaying a list of items, you can usually display all deactivated items, by selecting the Deactivated Items Only box in the Filter Pane.
The deactivation process is reversible, so you can retrieve deactivated items when they may be required. The process of retrieving deactivated items is known as reactivating deactivated items.
What does 'Reactivate' mean?
Reactivation is the process of reinstating a previously deactivated item. For example, if you reactivate a Student user, then they will reappear in the Students List.
Why can't I see all the information on the screen?
There are a number of reasons why you may not be able to see all the information you require on your screen, even though you are viewing the correct screen. The reasons include:
There is too much information to display on your screen
You may need to click on the Load More button  if it is visible on your screen. Whenever you click this button, the next 100 rows of information will be displayed.
You may also use the scroll bar to display more information. If a scroll bar is displayed, then this means that additional information is available to view.
You have applied filters
If you have applied filters, then only items that fulfil the criteria you selected are being displayed. Ensure that you have removed any filters so you can view all information.
You have entered text in the search box
If you have entered any text in the Search box, then only items that fulfil the search criteria will be displayed. Ensure that you have deleted all text from the Search box in order to view all information.
How do I apply filters to a list?
You can apply filters to lists by using the Filter pane or the Filter box, which both work in the same way.
The purpose of filtering is to reduce the number of rows of information that are currently visible on your screen, based on specific criteria. Filtering enables you to glean the information you require from a large volume of information, such as a long list of students.
By ticking boxes in the Filter pane or Filter box, you can define the criteria for the contents of the list. The tick boxes are sometimes referred to as 'tags'. Most tags are predefined and are built into your system. The System Administrator can define tags specifically for your organisation, if required.
For example, when viewing the Student List, if you wanted to find Male students who have English as their second language, then you would tick the following boxes in the Filter tags:
- Male
- Yes (in the English as a Second Language area)
The Students list will now display only those male students who have English as their second language.
To filter a list using the Filter pane
1. Ensure that you can see the Filter pane on the left side of your screen. The Filter pane is displayed on screens that contain lists of items, such at the Students List, Sittings List, Users List and Reports List. If the Filter pane is not visible, then it is possibly hidden. To display it, click the Filter pane  button, which is displayed at the top left of the screen.
2. Select the tag(s) that define the criteria for your list. If a scroll bar is displayed in the Filter pane, this means there are additional filter options at the bottom of the Filter Pane that are not currently visible. Scroll down to see these additional options.
3. As you tick each tag, your list will update to include only the items that you want to see.
To filter a list using the Filter box
1. Ensure that the Filter box is displayed on your screen. It can be accessed by:
-
- Clicking on the Refine Search link. The Refine Search link is displayed within a number of screens including the Student Management screen and the User Management screen.
- Clicking on the Show More button in the Filter pane. This button is only displayed if there is not enough space on the Filter pane to display all the tags available.
2. Select the tab that contains the tag(s) that you require.
3. Select the tag(s) that define the criteria for your list.
4. Continue clicking on tabs until you have found and selected all the tags you require for your list.
5. Click on the Done button to close the Filter box and apply the tags to the list. Your list will now only contain the items that fulfil the criteria defined by the ticked tags.
How do I remove filters from a list?
To remove filters from a list, you can use any of the following methods:
- Untick all check boxes in the Filter pane.
- Click on the Clear All buttons for clearing the Filter pane areas that contain ticked boxes.
- Go to a different page in the system and then return to the current page. Each time you open the page afresh, all filtering and searching options will automatically be removed.
Click the Remove All button from within the Filter box and then the click on the Done button to close the window and return to the list.
How do I search for an item in a list?
You can search any list using the Search box, which is displayed at the top of the list.
You can enter words in full or partially in the Search box, including numbers.
The columns that are searched will depend upon which list you are viewing. For example, if you are searching the Student List, then the first two columns (First Name and Last Name) are searched. Within the Sitting List, only the first column is searched, which contains the Sitting Names.
Searching the Students List
If you want to find all students whose first names and last names contain the characters 'br', then enter br in the search box. Names akin to those of the following students will be displayed:
Bradley Green
Bryn Frost
How do I sort a list?
You can sort any list that contains the Ascending/Descending Sort button  in the column headings.
The Ascending/Descending Sort button  can be in either Ascending Sort mode
  or Descending Sort mode
  .
.
When the button is in Ascending Sort mode, the top part of the button is highlighted  .
.
When the button is in Descending Sort mode, the lower part of the button is highlighted  .
.
Ascending/Descending Sort button is a toggle button, which means clicking on it once will sort the list in ascending order, clicking it again will sort the list in descending order.
For example, if you want to sort the Student list by Last Name, then click on the Ascending/Descending Sort button in the Last Name column header. Notice the top part of the Ascending/Descending Sort button is highlighted and the list is now sorted by Last Name in ascending order.
To reverse the order of this column to descending order, click theAscending/Descending Sort button again. The lower part of the Ascending/Descending Sort button will now be highlighted and the list would now be sorted by Last Name in descending order.
How do I find out what age and year group each test is designed for?
You can find out what age (and year group) each test is designed for by viewing the Teacher Guidance Pack for that specific test or see our product support pages.

